Photo Essay

My photo essay initial idea was to take photos of different perspectives that are different from our usual view. I wanted to play with bird’s eye view and also low angle perspectives, like what my dog would see. During my first few rounds of taking pictures, I brought my dog with my and included him in various shots.

Knowing that the photo essay would be later placed in a book; I decided to pay the Center for Book Arts a visit to get some inspiration on possible book layout and ideas. The visit was fun and I was able to see letterpress in action, but I still did not know what kind of binding I would use for my book. I was certain I wanted to bind and not fold an instant book though.

I kept exploring the internet to see what I could do and I came across a scrapbook idea that I really liked. By this point of reviewing and choosing pictures, the photo essay was shaping into a photo essay around Bentley, my bichon frise and poodle mix dog. It was becoming like “A day in the life of Bentley.” Although I love my dog to bits and pieces, reviewing my pictures again the week before it was due, I realized I wasn’t completely happy with what I had. I felt like I was beefing up the book with a lot of craft and that the story and pictures itself were not all that strong. I spoke to Carmile and showed her some of the shots that I really liked and she told me to take the week to go back to taking pictures.

This slideshow requires JavaScript.

At this point, I knew I had to work fast and work hard so I wouldn’t fall behind. I narrowed down 600+ pictures to 24 and sent contacts sheets to Carmile for feedback. Coincidentally, in my Typography class that week, we were starting our new project, a fun facts book so our professor actually brought in a bunch of samples of book mockups that she created and I saw the perfect layout for my subject! Remember how I said I really wanted to bind? Guess what, that changed. I opted for a folded instant book instead. I also created a sleeve for it and made the book reversible and can be folded both ways.

I’m actually quite happy with the final product, even though I didn’t get to bind. Production was painful though. It took approximately four 2-hour sessions at the AMT Lab plotter to be able to print the two documents the way I wanted it.

This slideshow requires JavaScript.


Manhattan Street Performance: A Photo Essay

The process of developing my photo essay over the course of two months was an interesting one.  For worse or for better, very little of my original idea survived to the final stages of the process.

If this project taught me anything (in fact, it taught me many things), it is that sticking to your original vision of a final product can actually limit its development. As my Digital Layout professor KC Witherell says, “Don’t get married to an idea.”  This project, like all others at Parsons, put me to the test: could I gracefully allow my ideas and my work to change from my original vision?

When we were first assigned the project, I had my heart set on photographing the performers who jump on the subways and dance on the poles; I saw them everywhere I went during my first month in New York, and I thought that the way the performers affected the body language of the subway riders was very interesting.  People immediately cast their eyes to the floor, to the wall, anywhere but at the performers.  By betraying even the slightest hint of amusement or attention, it was as if the subway riders were entering into a contract with the performers: you must tip us.

Alas, the very day I decided to photograph the contrast between the performers’ body language and the subway riders’ body language was the last day I saw the subway performers until–get this–3 days after the final photo essay was due.  I spent the first weekend of the project riding around the city for hours until finally I decided to cast a wider net and photograph performers anywhere I found them, and any form I found them.  I photographed violinists, break dancers, saxophonists, children’s entertainers, bands; everyone I could find.  I tried to get close-ups of the performers’ faces and the spectators’ faces, looking for contrasts.

After the first critique with Michael Durham, former photojournalist at Life Magazine, it was decided that the close-ups weren’t really working, and in fact the most interesting photos were of the breakdancers.  Photos from days of photographing were discarded.

At that point, too, I needed to come up with a concept for the text that would accompany my photos when they were bound into my final book.  Luckily, with inspiration from Michael Durham, the idea to interview the breakdancers for my text came quickly, and the following week I went back to City Hall where I had initially seen the street performers to ask some questions.  After weeks of observing street performers, I had grown very curious about the lives they lead.

When I got to City Hall, I saw that many of the performers I had originally photographed were there again in the same spot, nearly a month later.  I watched a performance, took some photos, and then approached some of the men for an interview.  I am naturally shy, so the thought of choosing people as my subjects in the first place had been a bit nerve-racking; the thought of interviewing my subjects was even more so.  Ultimately, though, I’m so glad I chose to do these things for my work, because the results were so rewarding.  This is the work that I’m most proud of (so far) at Parsons.

With my photos taken and text written, I set about the task of laying out my book and then binding it.  This took some weeks of revision as well.  Some photos of my mock-ups:

This slideshow requires JavaScript.

I decided to make my book into a circle accordion.  That way, my book would fit neatly into a cover and could be pages through as an ordinary book, but could also be displayed in a circle to mimic a street performance: photographs of performers in the center; spectators circling around.  I had to scale my book down slightly for practical reasons. Finding reasonably priced and manageable ways to print a document that’s 6.25 inches by 85 inches was unsurprisingly a bit of a mission!

Here are some photos of the (almost) final version (small refinements will be made before the end of the semester):

This slideshow requires JavaScript.

Though the process was long, this was a project that I enjoyed from start to finish, and learned many things along the way.  I discovered that I love bookbinding, and that interviewing subjects isn’t half bad either.  I’m looking forward to producing many more photo essays in the future!

This slideshow requires JavaScript.

The art of starting over:

Or why Parsons totally owes me a manicure.

My photo book is actually a collection of “records” acting pages and which are bound by an LP sleeve.

My original intent was to create a full sized 33rd record book—a.k.a  12-inch diameter book. However, confronted with design challenges posed by an off line vinyl sticker printer in the Parson’s Art, Media, and Technology lab, I was forced to resize to a paper size accommodated by sticker paper manufacturers. The design was modified again post-critique and goo-goned to Hell and back in order to make refinements and (hopefully) take advantage of the AMT lab vinyl printer.

unnamed-1
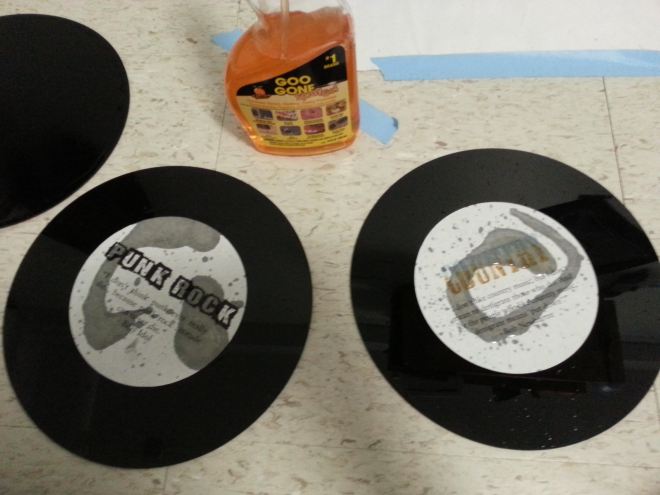
At the moment my pages are soaking in a bucket of 1-part water to 2-parts isopropyl alcohol in the hope that someday they won’t smell and feel like orange goo-gone. They soak while I blog and file down the finger stumps I am left with after picking off 18 stickers!

unnamed
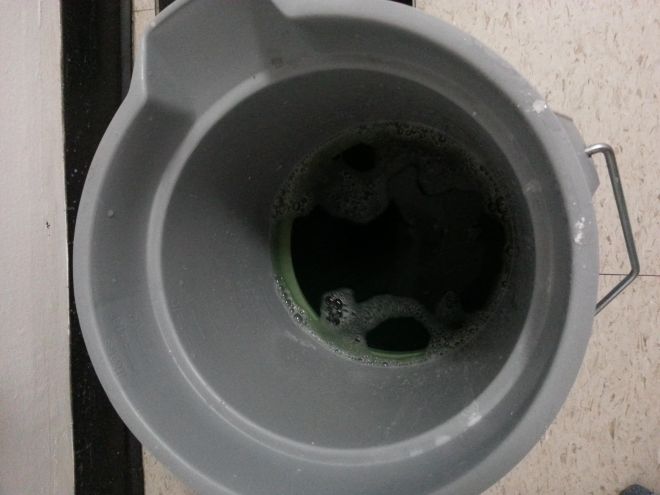
As much as I was less than enthusiastic about starting over I did learn a lot about my process as a designer.  I suffer from a tendency to plow ahead without thinking fully about the final product.  Or rather, I know what the ideal final product would be in my head but occasionally fail to think through the steps to get there.  I believe that, having worked out in the ‘real world’ for a number of years before returning to school I have been trained to work to completion, if not perfection–and I am seeing this across all my classes.

Definitely a habit that is…almost broken by this class.

BUT, now that the Parsons AMT lab vinyl printer is back in business,  I am thrilled to refine the project!

A Reminder: The Grolier Club

The Grolier Club

You are missing another NYC gem for those of you that have not visited The Grolier Club on the upper Eastside especially if you are a lover of books, printing, collecting…and more. It is a treat to walk through an exhibit in this Club established in 1884.

Here is a quote from The Grolier Club Constitution that can describe this “to foster the study, collecting, and appreciation of books and works on paper, their art, history, production, and commerce. It shall pursue this mission through the maintenance of a library devoted to all aspects of the book and graphic arts and especially bibliography; through the occasional publication of books designed to illustrate, promote and encourage the book and graphic arts; through exhibitions and educational programs for its members and the general public; and through the maintenance of a Club building for the safekeeping of its property, and otherwise suitable for the purposes of the Club.”

Cover Design from Just So Stories by Rudyard Kipling

Here is a list of their exhibitions (now through 2016).

Go to their web site for more information.

http://www.grolierclub.org

Admission: Exhibitions are open to the public free of charge

CHILDREN’S EXHBITIONS

• Now until February 7, 2016 | One Hundred Books Famous In Children’s Literature

GROUND FLOOR GALLERY

  • December 9, 2015-February 6, 2016  |“The Grolier Club Collects II.” Curated by Eric Holzenberg and Arthur Schwarz
  • February 24-May 14, 2016 | “The Royal Game of the Goose: Four Hundred Years of Printed Board Games.”
  • June 1-July 30, 2016 | “Artists & Others: The Imaginative French Book, 2000-2015.”

SECOND FLOOR GALLERY

  • November 19, 2015-January 16, 2016 | “Illustrated by Lynd Ward,” From the Collection of Robert Dance.
  • January 28-March 12, 2016 | “Blooks: The Art of Books That Aren’t,” from the Collection of Mindell Dubansky.
  • March 24-May 28, 2016 | “‘Brush Up Your Shakespeare’,” Miniature Bindings from the Collection of Neale A. and Margaret Albert.

Location & Gallery Hours 

The Grolier Club
47 East 60th Street
New York, New York 10022
212-838-6690

Call to Confirm the Hours: Monday-Saturday, 10 am-5 pm.

Books


A few weeks ago we started working on a new project. We had to create the design of a book and think of a theme to research on.
Many of us came up with beautiful and creative ideas.
Here are some photos took in class of the different projects.

Juri’s very stylish and playful book – 5 sheets of paper with different styles and patterns to exchange the mannequin’s dress.
image
Juri’s book – “Le petit closet”
image
Sarah’s book – it has been extremely interesting to see her work in progress throughout the weeks. Her determination has over come all the struggles. This is the incredible result!
image
Sarah’s book on the designer Iris Apfel

Continue reading Books

ABOUT THE CENTER FOR BOOK ARTS | NYC

This is my semester post about one of my favorite places, The Center for Book Arts.

The Center is dedicated to exploring and cultivating contemporary aesthetic interpretations of the book as an art object, while preserving the traditional practices of the art of the book.

I like to remind everyone about this small NYC gem that is tucked away at 28 West 27th St on the 3rd floor as we embark on developing our photo essay books. The Center is a wonderful place for research and information from their exhibits they mount to the printing workshops to bookbinding classes.

See whats going on at The Center.  Hopefully it will be added to your own FAV list.

Home

28 West 27th St, 3rd Fl., New York, NY 10001 | 212-481-0295

GALLERY HOURS: Mon-Fri 11am-6pm | Sat 10am-5pm

Bookbinding Workshop Process & Experience

Last week our Process and Skills class was in a workshop format, where we all learned the actual process of creating a book. This Bookbinding workshop was run by the experimented Mary Ellen Buxton, who patiently and passionately shared her knowledge on the subject.

Before class, I went to go to Talas in Brooklyn, to get all of my supplies. However, I ended up going and it was closed :/ However, I found another shop about a stones throw from the Graham stop, called “Artist & Craftsman Supply” (761 Metropolitan Ave), that had everything I needed.

bookbinding1

The first part of class Ms. Buxton showed us the way to properly detect the direction of the grain in a piece of paper, by gently bending both sides of the paper just slightly enough to detect which side has a harder bounce. She then explained how it is very important to fold along the grain, otherwise the paper (most often when it’s a slightly thicker stock) will end up buckling, or ripping over some time. It is also important to correctly use the bone folder to achieve the cleanest fold possible. When looking for the grain, it is best write in pencil little arrows and numbers to help you remember and ease the process when you are finally ready to trim the paper.

She also emphasized the fact that when composing different books, she often makes cheat sheets, with her notes all over the test booklet, so she can make a bunch of mistakes and create several versions sometimes of a book before producing the perfect final product. This was reassuring to know that she doesn’t always get it right the first time! This is all in part of the process it takes to get the best end result.

Screen Shot 2015-10-10 at 5.47.34 PM

For this first book, we chose to have the cover paper in a color and the inside in white. I started with various paper at 12×18 and trimmed 4 pieces down to 4”x 18”. I folded the outside sheet in half, along the grain, and the white interior sheets were folded in three parts. One piece of each was taken off and then folded again in half – this part was then used to create the mini pamphlet inside the larger part of the book, where the bigger white pieces were stitched into create a French fold.

processandskills4

When stitching, it was important to use the bulldog clips to hold the book together, so all the pieces stay perfectly in place while putting holes and string through the book. In order to stich, you needed to use an awl (not the one I bought, which was very flimsy, I don’t recommend you get it) to poke three holes, and mark up inside numbers for each hole so you don’t confuse yourself when stitching. Luckily my thread was already coated in wax so it was easy to set up the thread and needle.

processandskills6

processandskills5

We ended up doing a Japanese stiching on the outside of the cover. Unfortunately, at the very end I realized that I had stitched incorrectly, and accidentally left one flap outside the book. However, throughout the workshop I realized that the entire process is a planning, trying and testing  game – if something ends up not working, or going as plan – you find a solution. So, we analyzed my book and found out how I could re-stich in order to make the book work. Success! I will be sure to think of this when creating my next book.

processandskills2 processandskills3

Another thing I thought was really interesting about the class was how we talked about how each book is created in a certain way to reflect its content. It was really great to see some of the complex bindings that Ms. Buxton brought in and hear and see how well they were thought through to reflect the authors message/the meaning and purpose of the book. To be honest, this was not always something that I considered whenever picking up a book, but it is now something that I am definitely going to think of when browsing the stocks and when creating my own books in the future.

processandskills7

(Amy Staropoli)

Bookbinding Workshop with Mary Ellen Buxton

In our most recent Process & Skills class, Mary Ellen Buxton provided us with a Bookbinding Workshop. I was super excited to participate in this workshop.

First, Mary Ellen showed us some intricate examples of bookbinding that she has done and her process in solving a bookbinding problem. She creates many drafts of the book and keeps a “cheat sheet” of how she got there inside the draft with a smaller mock up. She also showed us examples of other books such as the accordion fold books, and tunnel books.

How to Determine Grain

She then explained how to determine long grain and short grain and that the spine should always run along the long grain. To determine the grain, roll up a small part of the edge and gently press down to fell the bounce in the paper. The lighter bounce side is the longer grain. Since we want the spine to be along the long grain, we folded and cut the paper against the grain. When this occurs, you will notice buckling/cracking in thicker paper. She also showed us how to use a bone folder to fold and crease the paper. The trick to using a bone folder is to start in the middle and go outwards.

We used a color sheet for the cover and three white sheets for the inside. Each sheet is approximately 4″ in width and 20″ in length. The color sheet is then folded in half along the long grain. The white sheets for the inside are then folded into threes and one panel is then cut off and then folded in half. With the bigger folded sheets, we used the French fold and stitched the open sides into the spine. The smaller folded sheets were then added in to the first larger sheet with pamphlet stitching.

individual sheets

IMG_6008

Pamphlet Stitching

In order to do the pamphlet stitch, use a bulldog clip to hold the smaller pages to the large page, leaving half and inch of space from the folded large sheet. Open the small book to the middle and draw three points; one in the middle of the crease and the other two between the middle of the point and the top and bottom edge of the sheet. Now, taking the awl, poke holes through the three points. Number the middle hole #1 and either of the other two #2 and #3. We need to prepare our thread for stitching, measure three to four times of the spine length worth of thread. Take the thread and run it through the beeswax so that it doesn’t rip the paper and to wax it together so it is easier to thread into the needle. Taking the needle and thread, start from the inside and pull the thread through #1 hole to the outside then from the outside, leaving approximately 3″ at the end. Then, pull the thread through hole #2 from the outside to inside then to hole #3 going from the inside to the outside this time. Finally, bring the thread through hole #1 from the outside back to the inside and tie a knot (right over left, then left over right). Cut the thread leaving 1″ of the ends.

pamphlet stitch

preparing for Japanese stitch

Japanese Stitching

Finally, we bind the french fold pages to the cover sheet using a simple Japanese stitch. Use two bulldog clips to hold down the pages and cover in place. Prepare two pieces of threads that are four times the length of the spine. Create two holes half an inch from the two corners. Working with one hole at a time, take one of the threads from the front of the book to the back, leaving 3″ at the end, bring that thread around the top and through the hole again from the front then around the side and through the hole again from the front. Tie a knot here when you are done. Repeat on the other side. Now that both sides are down, tie a knot in the middle of the two loose from the spine and then again approximately 1″ away. This now creates a hook for the book to be hung from. Cut off the excess, leaving approximately 1″ at the ends.

Japanese stitch

final booklet

final booklet hanging

final book inside

This was my first time participating in a bookbinding workshop and I’m hooked! I would love to explore other methods and come up with my own solutions to my bookbinding problems. I think I will check out the workshops at the Center for Book Arts next. I also found a YouTube tutorial I would like to attempt for my next DIY sketch book using a Coptic Stitch.

The Center for Book Arts: Then & Now

” Book Arts. Art of the Book. Artist’s Books. Printmaking. Book Binding. Paper Arts. These are just a few of the terms that come into play in the subject at hand, and one of the reasons that [I’ll stick with] Book Arts is, perhaps the ultimate interdisciplinary art of our time.” – Peggy Roalf

The Center for Book Arts, located in New York City’s Flatiron District, is a leader in the field, and the first not-for-profit center of its kind in the country. Founded in 1974, it has become a model for other such organizations that have since proliferated from coast to coast.  In celebrating its 40th anniversary, CBA has produced a series of exhibitions that reveal the many faces of Book Arts, from printing and binding; writing; collecting; and conservation. The current show, Then & Now: Ten Years of Residencies at the Center for Book Arts, organized by Executive Director and Curator Alexander Campos, offers a microcosmic view of the possibilities that artists explore using paper [but not always]; printing [but not always]; binding [but not always]; stitching [often]; architecture [sometimes]; performance, music and video [more often than you might think]; and imagination [always]. – from DART | Design Arts Daily

CBA_ThenAndNow1

Exhibition area displaying many different creative approaches to the art of the book.
Exhibition areas displaying many different creative approaches to the art of the book.
Jessica Lagunas | Wave Hilll’s Books of Leaves
Sara Parkel | Baggage
Elysa Voshell | Space Between You & Me

More information for the exhibition Then & Now and two companion exhibitions:

Then & Now: Ten Years of Residencies at the Center for Book Arts, and

Featured Artist Projects: 2014 Workspace Artist-in-Residence and Linda Carreiro: Inside Out of Words, continue through June 27 at The Center for Book Arts, 28 West 27th Street, Third Floor, NY, NY.

The exhibition Then & Now will travel, opening at the Castle Gallery at The College of New Rochelle, on September 8. An exhibition catalogue is in production. Workshops and Certificate Program classes continue. 

http://centerforbookarts.org/visit/location-hours/

Printed Matter @ NYU

Learn to Read Art: A Surviving History of Printed Matter

Opening at NYU’s 80 Washington Square East (WSE) Gallery

December 2, 2014 – February 14, 2015

lightbox_Screen_Shot_2014-11-25_at_4.12.31_PM

Printed Matter, a pioneer in the field of artists’ books and a nerve center for New York’s alternative arts world for four decades, is the subject of the newest exhibition and publishing project at NYU’s 80WSE gallery, launching December 2. A public opening will take place on Friday, December 12th, 6- 8PM.

A carefully selected amalgamation of books, records, exhibition documentation and flyers,Learn to Read Art: A Surviving History of Printed Matter charts the organizational history of the New York non-profit in relation to the history of artists’ books and important movements in contemporary art from the 70’s to the present, encompassing the alternative space movement, downtown NYC counter-cultural scenes, and artist activism.

“The field of artists’ books traces the historical trajectory of contemporary art, and many pioneering conceptual artists produced books and publications in order to both reach wider audiences and to circumvent the market and the institutions that much of the work implicitly critiqued,” said Max Schumann, the Acting Executive Director and veteran of Printed Matter. “As one of the pioneering organizations in the field of artists’ books, Printed Matter has stood at the junction of the book as art-form, art-vehicle, art-concept and art-process throughout its 39 year history. The goal of this exhibition is to provide a space for the examination and celebration of this critical cultural activity.”

Printed Matter was founded in 1976 by Sol Lewitt and Lucy Lippard among others, and capitalized on the growing interest in publications made by leading contemporary artists, such as Vito Acconci, Kathy Acker, John Baldessari, Hanne Darboven, Alison Knowles, Louise Lawler, Sol LeWitt, Edward Ruscha, and Lawrence Weiner. Through decades of its own records and files, Learn to Read Art provides a visual account of the history of the store’s collaboration with artists as well as the contemporary art scene in which it engaged.

Learn to Read Art: A Surviving History of Printed Matter will be organized along a timeline of documents, ephemera, editions and publications, which will be presented alongside a chronologically arranged reading library of artists’ books from the corresponding decades, allowing for a hands-on, between-the-covers interaction with exhibition.

Publishing Residency
Complimenting the expansive visual installation will be a fully equipped onsite bookmaking studio where artist residents will produce new publications over the course of the exhibition. Artists Mary Ellen Carroll, Juliana Huxtable, Red76, Research and Destroy New York City and Josh Smith will work with the support of NYU studio assistants to produce editioned publications on a photocopy printer, a risograph printer, silkscreen, and letterpress.

Pop-up Bookshop
A portion of the exhibition space will become a temporary Printed Matter bookstore, featuring a broad selection of contemporary artists’ books from the organization’s inventory. Publications will be available for sale, providing an important platform for the activation of these works through their physical dissemination. Books produced onsite by publishing residents will also be available within this space.

“Printed Matter remains unique in its ability to democratize the field of contemporary art. Where else in NYC does an artist book by Ed Ruscha sit next to a zine by a teenager from rural Ohio?” said Jonathan Berger, Director of the 80WSE Gallery. “Through offering a full history of how Printed Matter developed as the vital institution that it is, I believe that this exhibition has the potential to be an incredible resource for new generations of artists in search of new and different independent models, which enable new possibilities that push beyond the confines of the present.”

Learn to Read Art: A Surviving History of Printed Matter is curated by artist/curator Max Schumann, a veteran of Printed Matter, and artist/curator Jonathan Berger, Director of the 80WSE Gallery and Assistant Professor of Art and Arts Professions at the NYU Steinhardt School.

The title of the exhibition is taken from a text piece by conceptual artist Lawrence Weiner, who has a career-long artists’ book practice, and has had a relationship with Printed Matter since its founding.

Learn to Read Art: A Surviving History of Printed Matter is on view at 80WSE Gallery, 80 Washington Square East, New York, NY, between December 2 – February 14, 2015. The gallery is open to the public Tuesday – Saturday, 10:30am – 6:00pm. Please note the Gallery will be closed for winter break December 20th – January 5th.

To receive additional information on the exhibition please email Shonna Keogan, Press Officer, New York University at resk91@nyu.edu or Max Schumann, Acting Executive Director, Printed Matter, at Mschumann@printedmatter.org.