An introverted poster portrait

I knew right away that I wanted to play with the idea of what it’s like to be an introvert — the feelings of being mysterious or mean, hidden or seen, and everything in between.

In my sketchbook experiments along the way I played with different ways to visualize these perceptions and feelings. I cut, dissected, rotated and obscured different elements in lots of combinations both ordered and more chaotic.

First draft – I used type and photography in a much more systematic way — the letters slightly shifting in each quadrant, and my face never fully in view except in the last when the full photo is revealed but not my face.

Second draft- in response to feedback to explore a less organized composition, my second draft was the most fun to make. I let go of the formal grid and played around with scale and a broader range of photography.

Final draft – this was an exercise in refinement — sharpening the photos, heightening the contrast, and finessing the composition.

As I look back, the conceptual thread between all three is looking at myself as a sort of visual puzzle — which seems fitting since I’ve been told I’m hard to read by virtually everyone I’ve met 🙂

Here’s a link to my drafts and process work.

Caroline

Opulent Oceans: an invitation to enjoy scientific art

By Mariana Bernárdez S.

The prompt and the exhibition

“For our final project you must do a promotional package of a museum exhibition: a poster, an invitation and a handout”, said Astrid as the end of the semester was approaching. While she explained her expectations, I began mentally going through those I had recently seen or wanting to see, and finally decided on the one I believed I could have more fun with: Opulent Oceans.

Opulent Oceans is an exhibition being held in the American Museum of Natural History that includes 46 beautiful reproductions from 33 rare and historic scientific works on marine life. I’ve always been interested in the merge of things that are normally seen as separate, so with this project my goal was to motivate people to discover and enjoy scientific art.


Key ideas and initial steps

My first step was to sketch out ideas based on my first visit, and put down on pen and paper (yes, I’m old-fashioned that way) the basic information of the exhibit: where and until when it was taking place, what it was about, what it was based on, what kind of illustrations were there, from what authors, who curated it, and any testimonies and reviews that had been written on it. After this exercise I realized I still wasn’t sure about the hows: how was it structured? How was the information displayed? How did it attract and retain the viewer? (Did it?). To answer these questions, I hopped on a bus and visited it again.

The second time around I photographed all the reproductions and the information they were accompanied by so I could revise them later (120 pictures in total). Immediately after, I walked through it again to enjoy it and “soak it in”. As I went on from French naturalist Pierre Belon’s woodcut of a dolphin (published in 1555) to an unnamed Indian artist’s illustration of a saltwater crocodile (published in a book by naturalist Hermann Schlegel in 1844), I was more and more astonished by the detail in the images. This inspired me to decide to (1) make the images the heroes of my pieces, (2) respond to the shapes of the animals portrayed and (3) be keen on selecting appropriate parts of the images that would give enough idea for the viewer to understand what they were about and how beautiful they were without giving out “the whole thing” (I decided not to display the images in their entirety to generate curiosity).

135 pictures later, I started playing around with them. I wanted to mirror the aesthetic of the exhibition without copying it, keep my compositions simple and use a neutral palette that would bring out the colors of the images. In this sense, I chose a light beige similar to the one around the exhibition as a background color for the images and a blueish-greeinsh-aquamarineish spot color as the PMS color for display type and the ocean (PANTONE P 174-16C). In terms of typography, because Opulent Oceans was both about scientific works and somewhat playful art, I chose a serif font that had a warmth to it and that could also be versatile: Miller Text.

The design process and execution

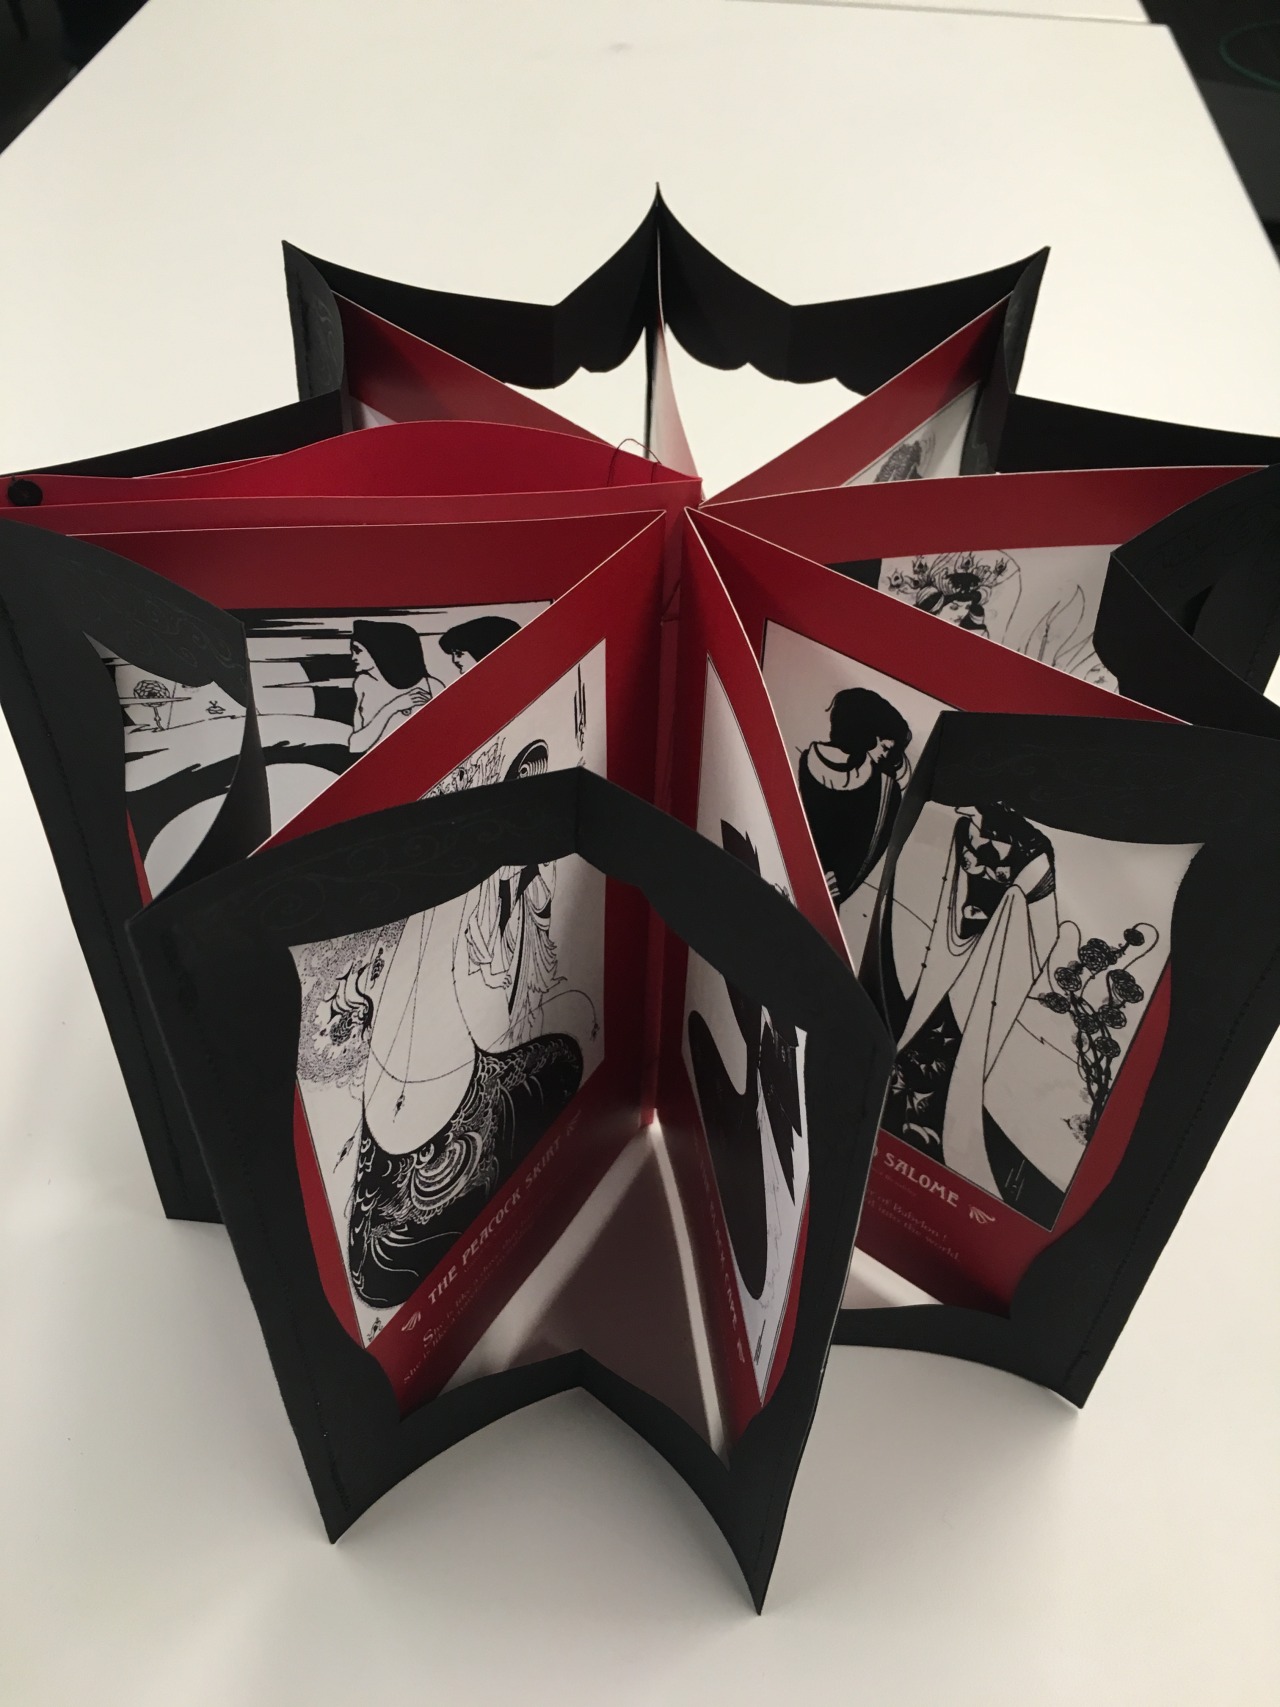
With all this in the table, it was time to start designing! I started off by making some posters and at some point decided to make them horizontal to express the opulence and extension/direction of the ocean. The handout was next, and this was a lengthy process: I went from a traditional trifold with basic information, to a trifold with a map inside where you could see where the illustrations were made, to an octopus that was grasping the trifold, to a crocodile whose mouth opened and the information was inside. At this point you might be thinking… why a trifold? I wanted to make something that would go “from small to big” (one-panel size to three-panel size) but was also easy to carry around. The crocodile, though, wasn’t a trifold, but I found it to be a thought-provoking solution. After many mockups, I ended up going for the octopus-grabbing trifold, which presented one fundamental and challenging problem: adapting the already-existing illustration of an octopus to the shape of the handout (It took some research, several cutting experiments and prints to get this right!)

Last but not least, the invitation. This was the most limited option: it had to be sent through mail, so it had to fit very specific criteria. My idea was to “invite to explore”, so having read about voyages in the book the exhibition was based on (Opulent Oceans: Extraordinary Rare Book Selections from the American Museum of Natural History), I set my mind to making a ship where the receiver of the invitation would come in to join the breakthroughs. The wow factor seemed simple, but proved to be complicated in its execution: the ship was a pop-up. After four different ship models, several mockups, experimentation and the discovery of the concept of “kirigami”, I finally managed to construct a suitable ship. I added the text, accompanied it with showcased imagery, and sent it off to print.

At this point you might be thinking everything was ready, but it wasn’t. Although printing is generally the final step, I had to cut the shape of the handout and the ship. The handout was not complicated, but if you ever decide to do a pop-up and there isn’t a laser cutter available, I have one essential recommendation for you: don’t be shy on the blades! You’ll probably need lots of them to get it right.

In case you want to visit it (and you should!), Opulent Oceans is up until December 1st 2016.

To check out photographs of my process and solutions, visit -> https://www.flickr.com/photos/143075634@N04/albums/72157668383851275


The Bottle Project

The bottle project assignment required us to demonstrate using two plastic bottles. The bottles were used to exhibit and bring two matching or opposing words to life. This demonstration could be displayed in any possible way, there were no restrictions. I decided to use science to illustrate my ideas and concepts, and to engage the viewer further more through live experiments conducted on the bottles.

 We were asked to create 50 thumbnail sketches of our ideas and concepts. The bottles represented two words that had some sort of relationship (antonyms, synonyms, etc.)

The final three selections I went with were:

Calm v/s Excited

Construct v/s Deconstruct

Social v/s Antisocial 


  1. Calm v/s Excited (or hyper)

‘Calm’ was extremely easy to display. I had diluted coke in one bottle with no fizz. Diet coke + Mentos did the trick to demonstrate the word ‘excited’ in the other bottle. When diet coke was put into a newly poured bottle of diet coke it immediately fizzes up due to the carbon dioxide produced by the mixture, this gives it a feeling of being hyper or excited. Unfortunately I’m having difficulty in embedding videos or uploading pictures so I am adding links. Hope it works!

Click here to view.

2. Construct v/s Deconstruct

I used two balloons, some vinegar, and Eno powder for this one. The balloons were attached to the nozzle of the bottles and as soon as the powder was poured into the vinegar the balloons began to inflate. While both the balloons inflated, I poked a hole in one of them to demonstrate the words “construct” and deconstruct” at the same time.

This was the end result of the experiment.

3. Social v/s antisocial

This was so much of fun to work with, but yet the most hands on experiment. After plenty of trial and errors did I finally get it right. The social bottle was extremely easy to show. I mixed water, food colouring, Savalon. All these were soluble liquids that blended well to illustrate the definition of the word “social”.

“Anti-social” was a bit tricky to do. After three trials I finally accomplished what I had initially aimed to do. I used immiscible liquids for this one, there was vegetable oil, water, milk, and maple syrup. Due to their various densities they all settled as separate layers instead of mixing as one. 

Passport Photo Essay

The Photo Essay was a lot of fun to make.  I had started out by continuing what I had put together for the photo collage, and using some of the same pictures.  For my photo collage, I had taken a lot of pictures of New Orleans as that was where I was going to go for looking at wedding venues the week prior.  I had taken those photos and thought of maybe making a passport booklet with them as I was traveling from New York to NOLA for this big event and the photos were going to be really fun and vibrant.  The collection of photos were fun but I was also hoping to take more and obviously I had left the state with only so many already taken.  I focused on practicing how to make books first.  The result of which can be found here.

The following week I was heading into NYC to look at dresses, I currently live on Long Island.  While shopping for them was going to take up a lot of time, I decided that maybe the second half of my passport could contain a lot of pictures from New York.  I could have some from my hometown, some from the city, and some from New Orleans which would fill up my book nicely and would work with the idea of a traveling passport.  I took a lot of those pictures out and printed them and put them on boards next to each other so that I could decide which ones I really want to work with. The result of that can be found here.

The next steps were putting all the pages together in a way that made sense with quotes to back them up.  I spent a lot of time researching good quotes on both locations, and thought I came up with a decent amount of quotes that outlined why I loved both places.  While also looking at many of the photos that I could choose from, I took my teacher’s suggest and decided that this would be a flip book that once you got to the center, you could flip around.  The New Orleans section would go one way and you would flip the  passport over for New York to go another way.  I really liked the idea, so when creating the basic first outline, I went for different typography, and other factors to help differentiate the locations.  The first draft of that can be found here.

The second draft of the passport can be found right here.  I did my best to try and plot out my first attack of how the pages would need to be printed in order for it to make sense with the flipping of the book.  A task that I would later find out was somehow still off and the only way to fix it was to print out a couple of first copies to see how and where the images went.  I also picked up what looked like nice blue paper for the cover and inside that reminded me of a passport’s colors.  I decided to work with the initial stitching we were taught as that is how I found out that passports are put together.  All of those I put in the next round of the draft to see how it was going.

The last and final piece of putting this passport together can be found here in a little video that I created. I also posted it again here with a slightly higher resolution. I worked on the typography a bit adding more spacing, and making sure the ascenders and descenders worked and weren’t touching, as well as giving the authors of the quotes an identical size and type.  The cover was also posted with stamps from both locations to give it a nice passport feel to it.  I really liked the result.  It was actually something that I found to be really nice to have personally as they were big trips that were put together.  The images came out really nice and clear, and even though some paper was used to figure out the coordination of the two different locations, in the end it was really fun.  It made me want to go out and make a couple more of them!

Bottle Project

The bottle project was a lot of fun to put together.  The idea of creating 50 thumbnails originally scared me, but then as I got to it, I had a really good time creating new ideas for word pairings.  I have attached the original 50 thumbnails here to take a look at.  I hope this website link works as unfortunately I can’t seem to upload any files or pictures currently.

50 Sketches

After I was finished putting the sketches together, we narrowed down the choices to three that I was going to reach further into.  I chose Death and Taxes, Trapped versus Freedom, and Inner versus Outer.  There were many fun combinations that I had put together, but these three really allowed me to deconstruct the bottle as well as come up with many solutions for the words. I saw the most promise in those three, so I created multiple sketches for each one.  Those solutions can be found right here.

When it came to selecting what materials to use and which one of those final sketches I could put together, I decided on Death and Taxes.  I wasn’t quite sure if I was going to rip open the bottle completely or if I was going to put a skull in the middle for the Death bottle, so I started with the tax bottle. My teacher had said that she liked the idea of the mailbox for the taxes bottle, so I went ahead and created an actual mailbox.  I had the mailbox as an outside entity at first but then decided to use the bottle, turn it over on its side and make it.  Inside the mailbox was an envelope that I stuck inside, with a sticky note on it saying April 15th.  I then took a red piece of paper and stuck it on the outside in the shape of the flag you see on a mailbox.  I thought the design looked pretty nice, but then went back to how to create death.

For the Death bottle, I surfed the internet for something to spark my mind, and had the hardest time finding something I wanted to pursue. I then came across this idea for a hologram that you can make, so I went around to articles and videos on how to do that.  I cut the bottle open, removing the cap and the bottle neck.  I then took the rest of the bottle and cut it up so that it became almost an upside pyramid.   I put a couple of those sticky notes saying April 15th on the outside and then placed the bottle on to my iPad, which had four rotating skulls on all sides of the bottle.  The result of doing that, was that now they are reflected to the center and created what looked like a hologram.  I like the fact that the mail comes usually during the day, and then for the death bottle, you had to turn the light off for the full effect, giving it a nice contrasting pair.  The result of those bottles, which contains videos as well can be seen here and here.


Better Late Than Never!

I didn’t stay on top of documenting my projects through the blog throughout the semester, so I thought the portfolio I put together would be a good way to show what I worked on this semester – basically this is like 4 or 5 blog posts for the price of one!

Here’s a link to the portfolio.

I think the photo essay book was my favorite, even though it was the one that almost made me cry! I really felt like the hard work (and it felt sometimes like a lot of work!) paid off and I am very proud of the finished product. Also, any excuse to eat Raffetto’s ravioli is fine with me.

My biggest takeaway from this class was needing to be patient about the process and realizing that you might hit a lot of dead ends before getting to what works. Each of those dead ends might involve a ton of time and effort, but you need to move on and try other things out if it’s not coming together. Definitely a valuable lesson for future work!


Book Project

Hi everyone. I’d like to share the process of my book project in P&S class.

For my book project I chose Aubrey Beardsley’s artwork, Salome, for the content. Making a book was recreating an atmosphere in the book. So the first thing I considered was how I could illustrate the mood and atmosphere of Beardsley’s artwork, and create in the reader an emotion or mood. This project had a no-adhesives rule, so the ways of binding the book were also a consideration.

I started to sketch several shapes of the book to figure out which shape would work, and decided to use the one that had a sense of peering into a model of a stage.

The format of my piece meant to resemble a carousel. It has two layers, one for the artwork and other for the frame. For the frame, I decided to use a type of drop curtain- like in a theater. I drew a pattern inspired by one of Beardsley’s illustrations.

The most difficult thing for me was choosing the typeface. I repeatedly asked myself, which typeface will fit to the time and the theme?. After much trial and error, I decided to use Caslon,because its legibility and delicate line and beautiful curve will match to the theme.

I used sewing machine to put each layer together, and it enabled me to show fine stitches as a pattern. Finally for biding, because my book need to open 360 degrees to look like a carousel, I chose Coptic bound.

Throughout this project, I really focused on “recreating an atmosphere”. I had hard time making decision for this book, but at the end I am really happy with my final result.

A Tantalizing, Mysterious Art Book (Or Is It Book Art?)

Yes, here I am again blogging about a new book.

I saw this The New York Times on line review. The timing is perfect for all our exploration into book designing from photo essays to art books.

“The artist’s book, a medium that originated in France at the turn of the last century, gets a digitally inspired reboot with “RadioPaper,” a project launching today at Studio Leigh in Hoxton, East London.Taking its title from the electronic paper that replicates the physical page in Kindles and other e-readers, the exhibition provides a showcase for the debut book work by the British artist Mary Ramsden, which will also be available to buy in an edition of 30. Framed in fluorescent-edged Perspex boxes, each of the copies of “RadioPaper” contains a series of abstract artworks by Ramsden, and perhaps more surprisingly, submerged within their French folds, five specially composed super-short stories by the Granta award-winning novelist Adam Thirlwell…” Read more of Aimee Farrell’s article published on December 12, 2015

See Image: A page in “RadioPaper,” a new collaborative artist’s book by the artist Mary Ramsden and the novelist Adam Thirlwell.CreditCourtesy of the artists and Studio Leigh

Book Process

*I could not upload any image because this blog’s storage is already full, so I am sorry for making you read through long sentences… Maybe hard to imagine my book looks like…*

Hi, everyone.
I’d like to share my process of the book project in P&S class.
My theme is “Singin’ in the Rain “, which is one of my most favorite movies.
1: Research and Experiment
Since we could not use any glue in this project, (and that was the most tough part of this project) I decided to use a folding style for my book. That was the starting point.

Through the research and experiment of some kinds of the ways of folding paper, I chose the twist style, which is square paper and folded like sort of pinwheel.

I wanted to use an umbrella motif, so this shape, which the way of opening up reminds me of opening an umbrella, is the most appropriate for my theme.
2: Figure Out the Contents
The one side is about the story of Singin’ in the Rain, the other side is about the main three casts of the movie.
3: Make Mock-ups
First, I drew the blueprint of both sides.
Then, putting tracing papers on them, figured out the layout and made mock-ups.
 I struggled to concern the design connection between hiding area and visible area when the book was folded and opened.
Since this movie is full of humor, great dance and music, I wanted to add some “fun” or “surprise” aspects. So I tried to be playful for the layout.
<Cast Side>
Taking Mark’s advice, I add white circles as spotlights for the casts.  I wanted this side to be look like a mini poster, so not only small pictures, I also put bigger portraits of the casts to have balance. Add to that, tried to make text boxes have shape.
<Storytelling side>

I put a big umbrella, which becomes a smaller one when the sheet is folded. Also, divided the story into 8 parts and set text, pictures along with the shape so that you can follow the story clockwise.

*Color…Blue and Yellow (Those two colors are sort of theme colors of the movie)
*Type…Futura
*Print…UC 4th floor, ProColor (My budget was so limited that I made good use school printers.  ProColor worked really good in my case, though I should have searched paper more.)
4: Edit and Edit and Edit and Final
Each week, I modified a little by little.  And taking Mark and classmates advice, I decided to add a envelope for the book in the end.  Keeping same concept (fun, surprise) and color theme, I made blue envelope with white dots, which represents raindrops. Also, gave it die cut to see one word behind.
When I first heard about this project, I got so lost because I did not know where to start.  But once I decided the theme, Singing in the Rain, the ideas came out smoothly.  Though my book style is a little bit far from ordinary books’ form, I am happy with having pushed this style.

AAS GD Type Meet up

Throughout the month of November and into the first week of December, I attended two out of the six AAS GD Type Meet up Peer Led Sessions. I met the lovely Lauren Peters-Collaer who is a third semester AAS GD student that will be graduating later this month. Since I was usually the only person there, the sessions were based around what I wanted to learn and work on. Lauren would always have some sort of activity/workshop planned and we would start from there. She is a great mentor that introduced me to many different resources such as: Fonts in UseType Wolf, and Typographic Posters.

Check out this animated video called Word As Image by Ji Lee and try creating your own!

She also introduced me to two typography based summer courses that would be worth checking out from SVA. If you are looking for something to do over the summer, you may want to check these out: Typography as Language and Masters Workshop. Typography as Language is a one month program that is based in New York. Masters Workshop is a two-week program that is in Italy. These sessions are taught by different guest lecturers.

For those that are interested in typography should definitely attend these sessions! Hopefully more will be scheduled soon.